Help Scout Connection
In this guide:
Introduction
In this guide, we’ll go over how to create the Help Scout Connection for BlinkMetrics. This will allow BlinkMetrics to pull data from Help Scout as a Source.
Authorizing Help Scout Connection
1. Go to the Connections Page
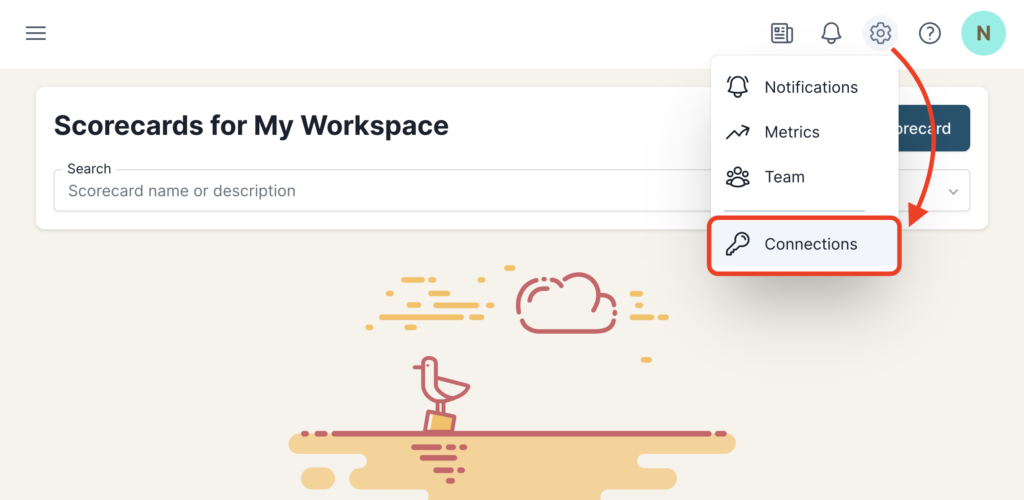
To create the Help Scout Connection, click on the Settings cog icon in the header > select the Connections menu item. This will open the Connections page. Next, click the Add Connection button.
2. Start Connection Setup
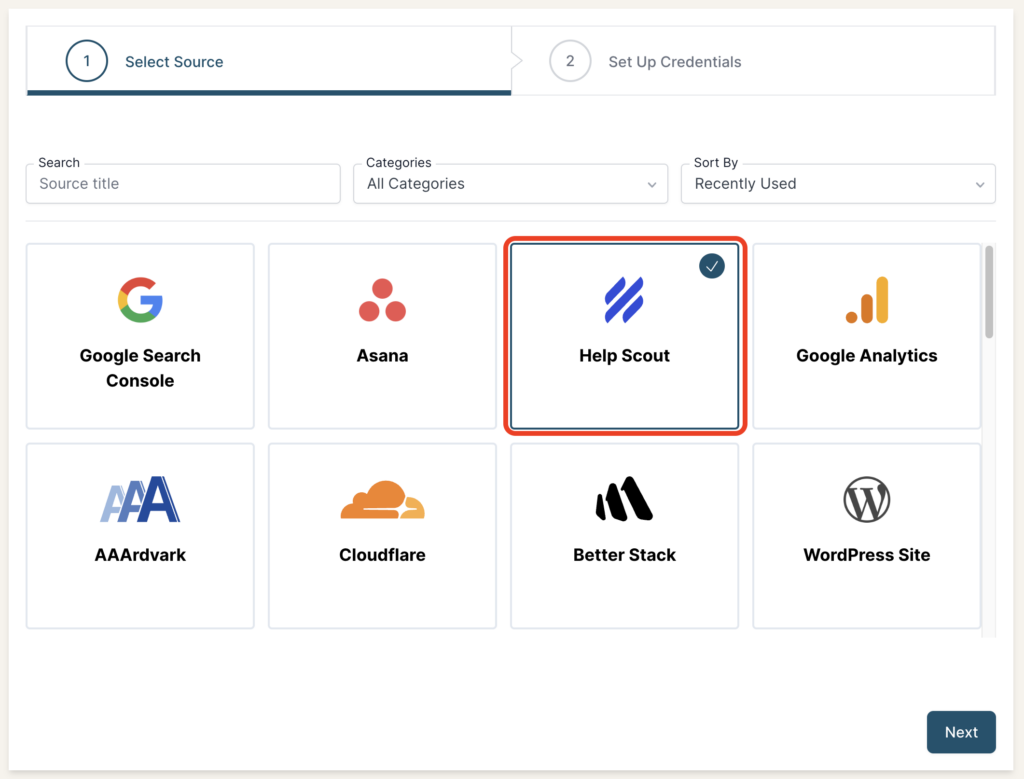
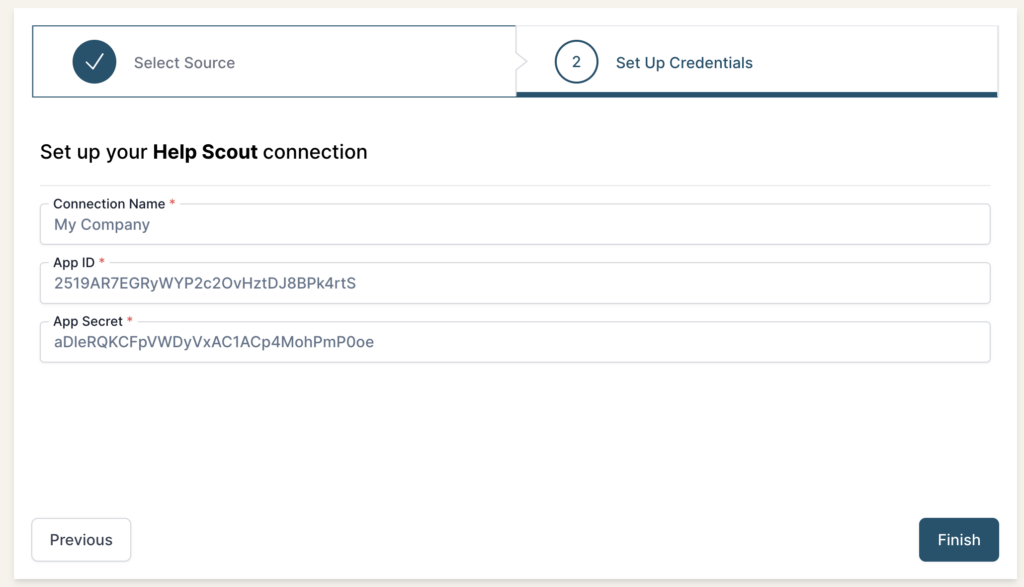
From the Connection Stepper interface, select Help Scout in the Select Source tab. In the Set Up Credentials tab, you’ll see a few fields that we need to fill in. Open a new tab and go to the next step in the guide. Don’t close this tab, though; we’ll need to return to this BlinkMetrics page in Step 4 below.
3. Create a Help Scout App
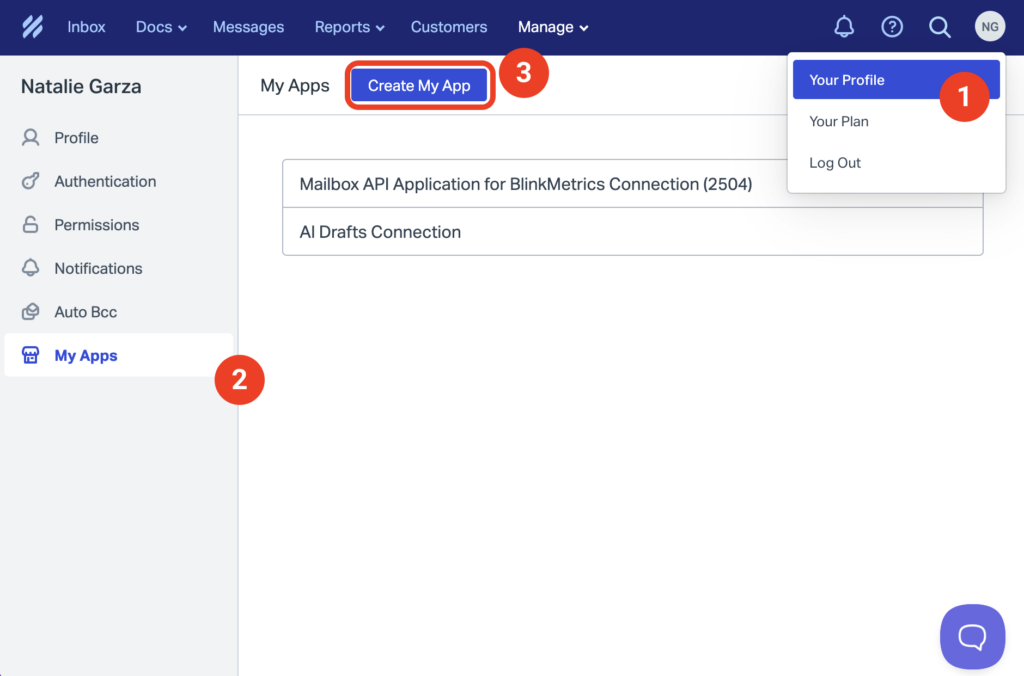
To create the connection with BlinkMetrics, we’ll need to start by visiting My Apps in HelpScout:
- Click on the Profile thumb in the top-right corner > Your Profile menu item
- Go to the My Apps tab in the sidebar
- Click on the Create My App button.
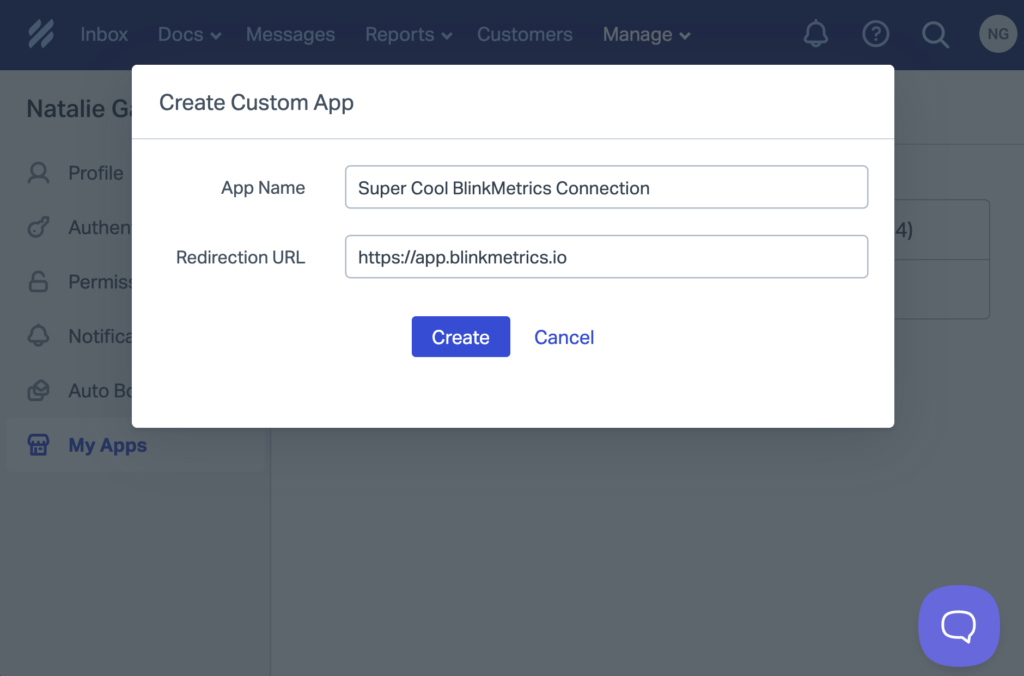
This will open the Create Custom App popup, where you’ll need to enter:
- App name: This is for organizational purposes only; we would suggest naming the app “Super Cool BlinkMetrics Connection”.
- Redirection URL: Enter the following URL “https://app.blinkmetrics.io“
When you’re done, click Create on the popup. The My Apps page should now have your new app listing; we’ll need to open that tab next to enter the App ID and App Secret back in BlinkMetrics in the next step.
Help Scout Plan Requirements
All of the Help Scout plans allow access to the Mailbox API. However, only the Plus and Pro plans are compatible with BlinkMetrics.
The Reporting endpoints are unavailable in the Standard plan; if you’re using this plan, BlinkMetrics will not be able to create any metrics after a connection is made.
| Plan | Rate Limit | Endpoint Access |
|---|---|---|
| Standard | Up to 200 calls per minute | No access to reporting endpoints, which is required for BlinkMetrics |
| Plus | Up to 400 calls per minute | All endpoints available |
| Pro | Up to 800 calls per minute | All endpoints available |
Though API rates do apply and vary across plans, BlinkMetrics manages them smoothly. Our code automatically detects when we’re nearing the limit and slows down calls as needed to stay within the limits.
Each Help Scout plan varies in API rates and endpoint access.
Permissions Needed
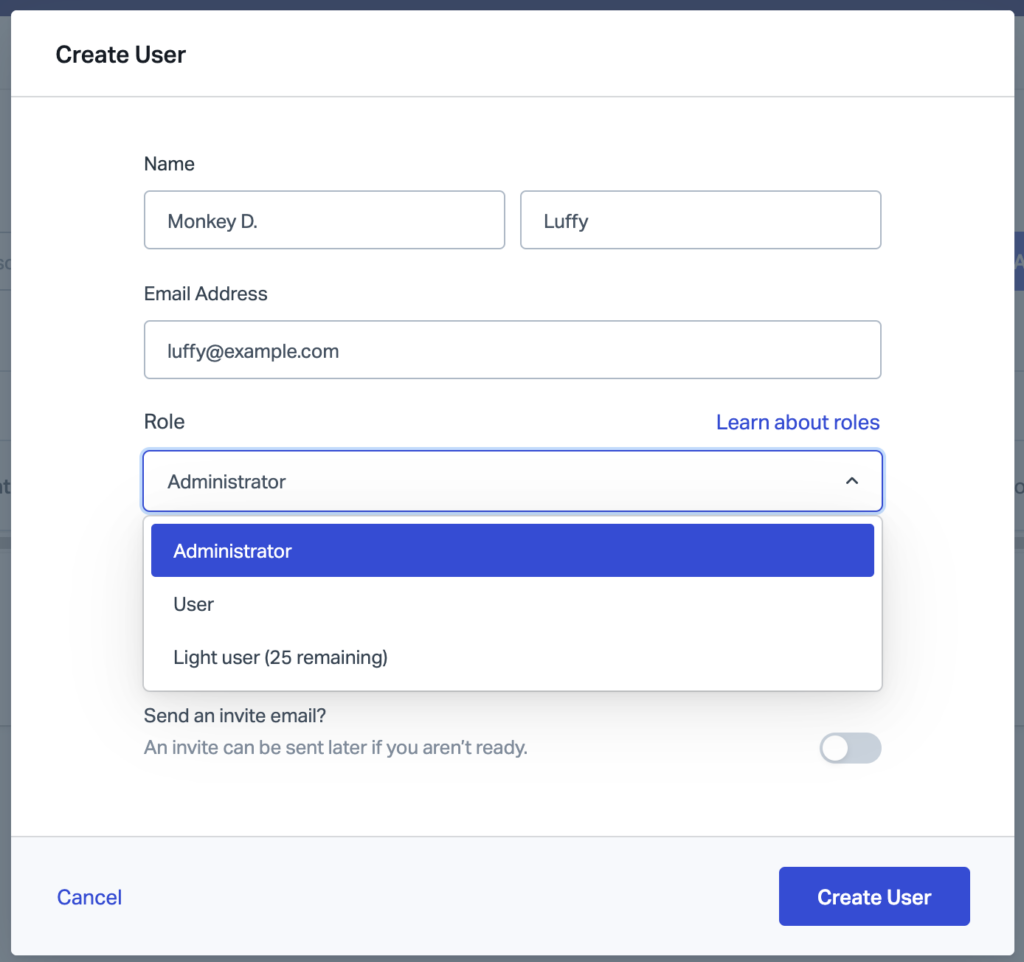
For a successful Help Scout connection, the account authorizing the connection needs to be either the Account Owner or the Administrator for the Help Scout account.
4. Set Up Credentials in BlinkMetrics
Now that you’ve set up the new Custom App in Help Scout, you can collect the App ID and App Secret that you need to finish the BlinkMetrics connection.
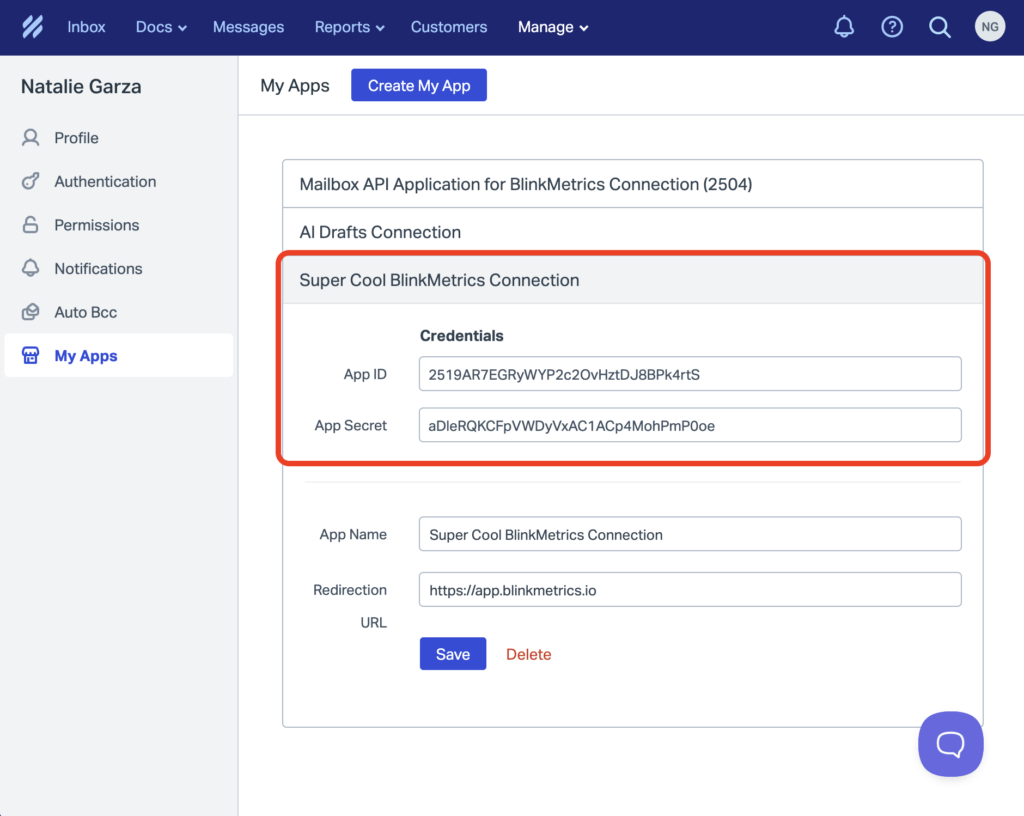
Back in the Set Up Credentials tab in BlinkMetrics, paste the App ID and App Secret into their respective fields. Enter a Connection Name; this is also just for organizational purposes and we recommend you detail which account it was connected to. When you’re done, click Finish.
5. Review Privacy and Save Connection
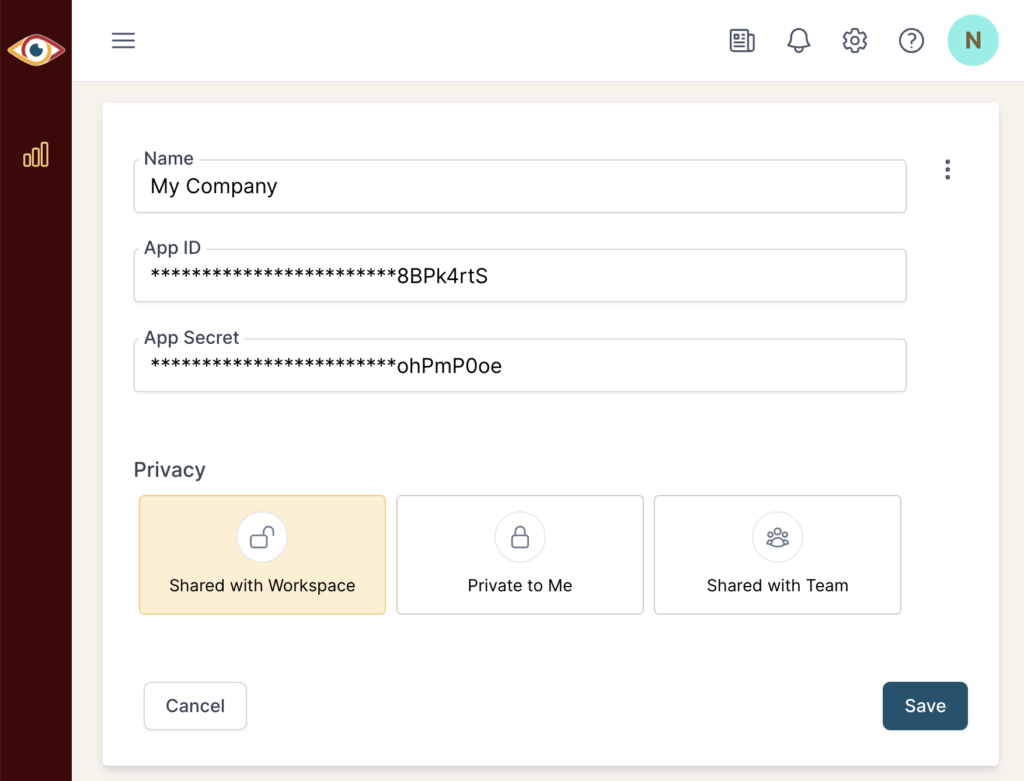
After you complete the connection, you’ll be redirected back to the Help Scout Connections page. You can click the new listing to view the Connection detail page. From here, you can see the following:
- Connection Name
- Help Scout App Keys
From here, you can also edit the following:
- Connection Name: Used for organizational purposes, each Source can have multiple Connections, so it’s helpful to see who authorized the Connection or which account it was connected to.
- App Keys: In the case that you need to update your Help Scout app keys, you can come here and swap them.
- Privacy: You can choose who it’s shared with: Shared with Workspace, Private to Me, or Shared with Team.
And that’s it! You can now use the Connection to pull data from the Help Scout Source.
