
WooCommerce Connection
In this guide:
Introduction
In this guide, we’ll go over how to create the WooCommerce Connection for BlinkMetrics. This will allow BlinkMetrics to pull data from WooCommerce as a Source.
Authorizing WooCommerce Connection
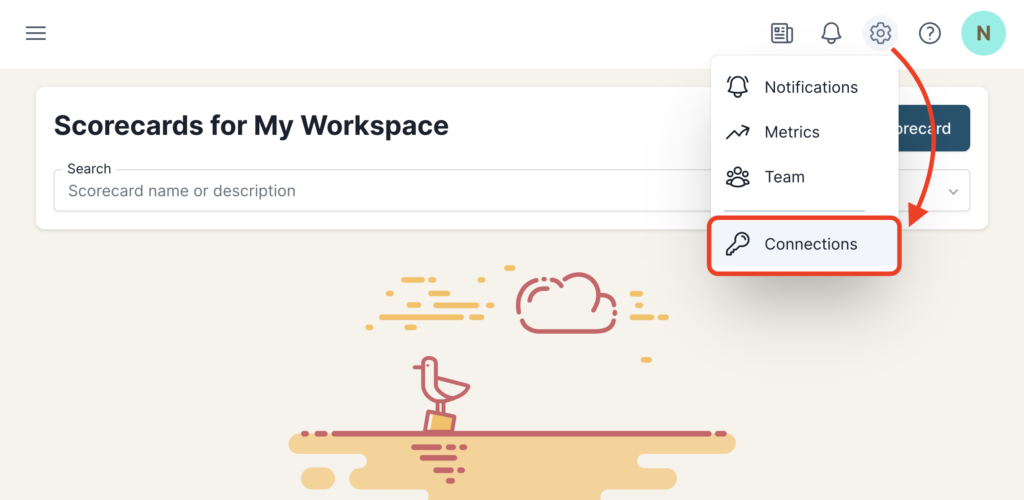
1. Go to the Connections Page
To create the WooCommerce Connection, click on the Settings cog icon in the header > select the Connections menu item. This will open the Connections page. Next, click the Add Connection button.
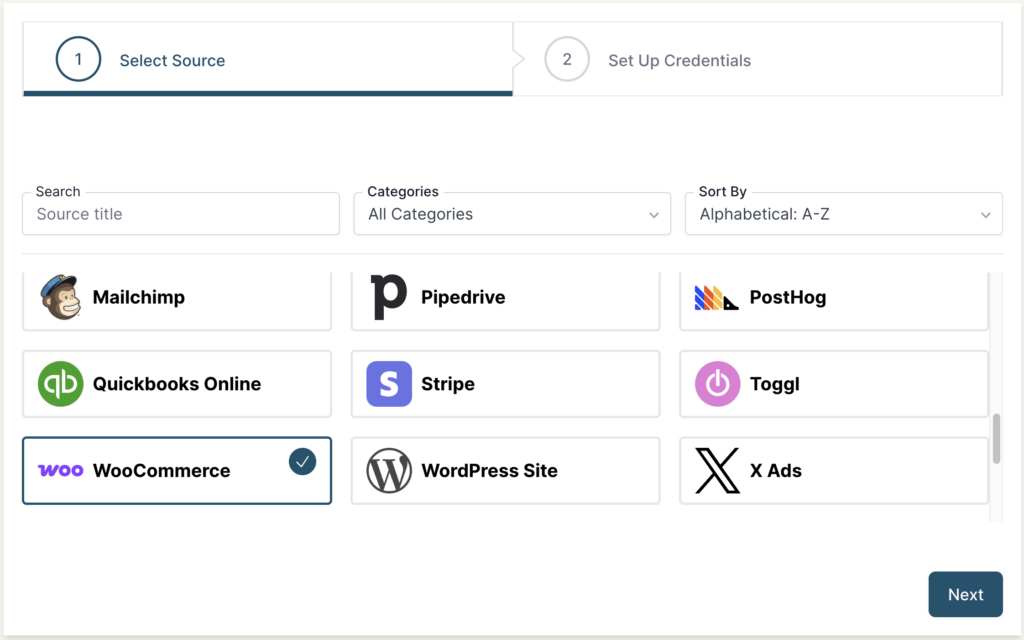
2. Add Connection
From the Connection Stepper interface, select WooCommerce in the Select Source tab. In the Set Up Credentials tab, click the Continue with WooCommerce button.
Make sure to log in to your website where WooCommerce is hosted before setting up the connection; otherwise, you’ll be prompted to Sign In before connecting to the app.
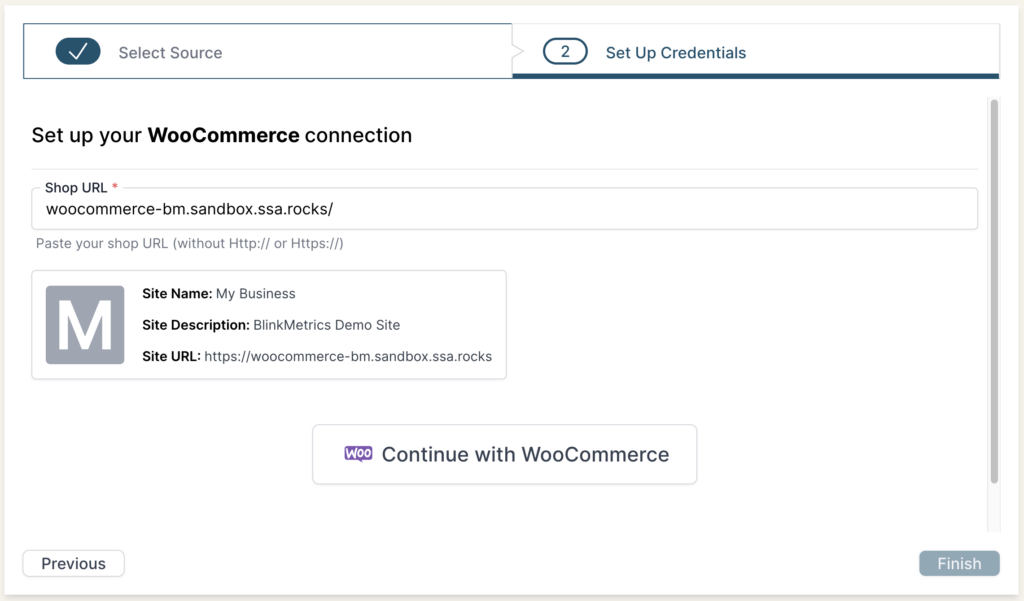
Enter the Shop URL to your WooCommerce website, and make sure to exclude HTTP:// from the URL. If a website is successfully detected, a description box will appear showing the Site Name, Description, and full URL.
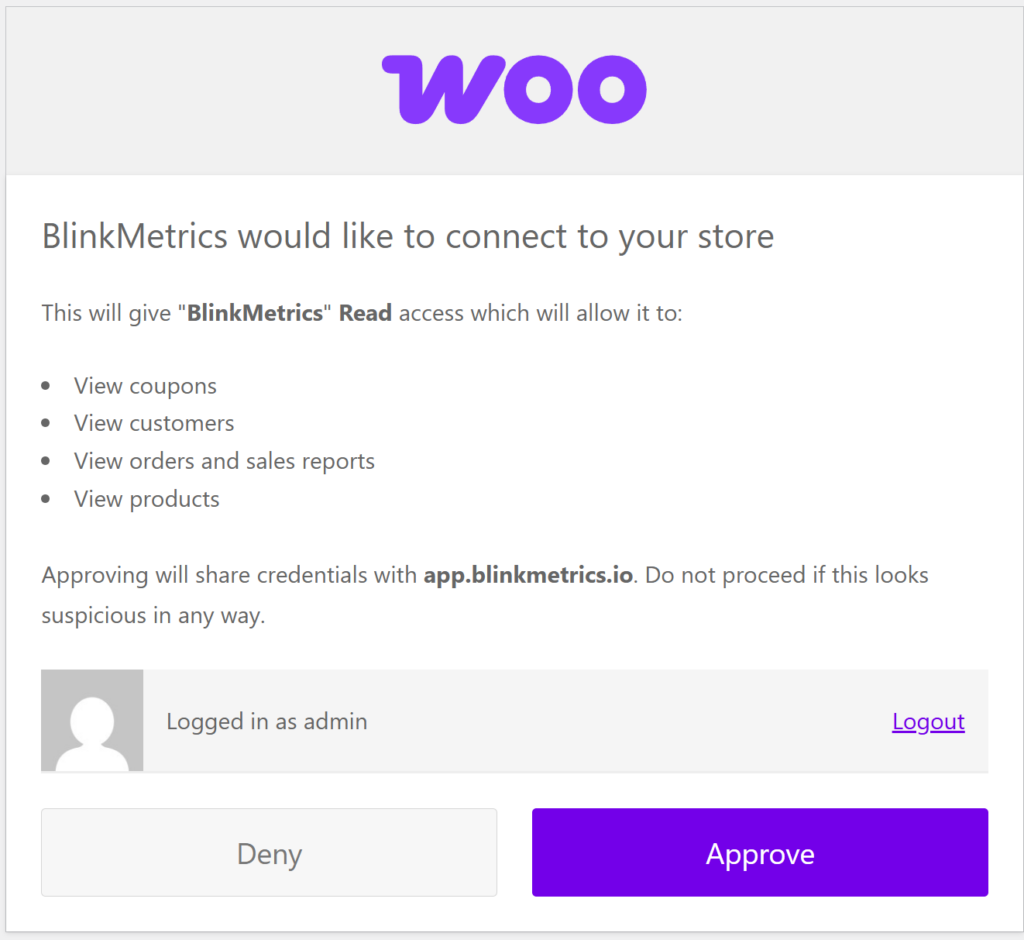
Clicking Continue with WooCommerce will redirect you to a WooCommerce authorization page on your website. Lastly, it’ll ask you to review and agree to BlinkMetrics connecting to your store and giving BlinkMetrics Read access, which will allow it to:
- View coupons
- View customers
- View orders and sales reports
- View products
When you’re done, click Approve. You’ll be redirected back to BlinkMetrics when you’re done.
Permissions Needed
Users need either the Administrator or Shop Manager WordPress roles to successfully authorize the full connection with BlinkMetrics.
If you have a different role, contact the Administrator to help create the connection with BlinkMetrics.
3. Review Privacy and Save Connection
After being redirected back to BlinkMetrics, you should see the message, Connection Created Successfully shown on the Connection page. From here, you can see an overview of the following:
- Connection Status
- Date Connected On
- User Connected By
From here, you can also edit the following:
- Connection Name: Used for organizational purposes, each Source can have multiple Connections, so it’s helpful to see who authorized the Connection or which account it was connected to.
- Privacy: You can choose who it’s shared with: Shared with Workspace, Private to Me, or Shared with Team.
When you’re done, click Save, and now you’re done! You can now use the Connection to pull data from the WooCommerce Source.

Cloudflare Custom Rule
If your site is running Cloudflare, please add a custom rule to avoid 403 forbidden errors.
Read our guide on how to set up the custom rule in Cloudflare for BlinkMetrics.