
Requesting a Shopify Connection from Someone Else
Introduction
Sometimes the Shopify store you need data from isn’t yours. A Connection Request lets you send a secure, one-time link to the person who does own it. They authorize their own Shopify account, and the Connection lands in your workspace — they never sign in to BlinkMetrics, and they don’t need an account.
Use a Connection Request when:
- You don’t own the Shopify account. It belongs to a client, a business partner, or someone else on the team.
- You have Shopify access, but not the right permissions. You may be a staff user on the store without the permission needed to approve an app. Rather than chase down a permissions change, send the request to someone who can approve it.
The rest of this guide covers creating and sending the request, what the person on the other end sees (so you can tell them what to expect), and what lands in your workspace once they’re done.
Creating the Connection Request
1. Go to the Connections Page
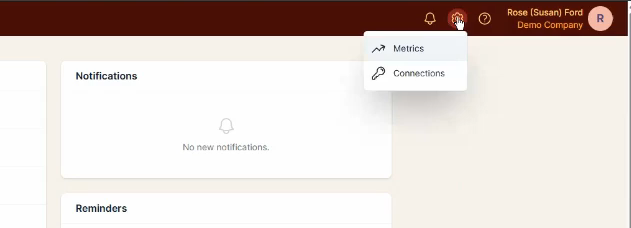
Click the Settings cog icon in the header, then select the Connections menu item.
2. Choose Create Connection Request
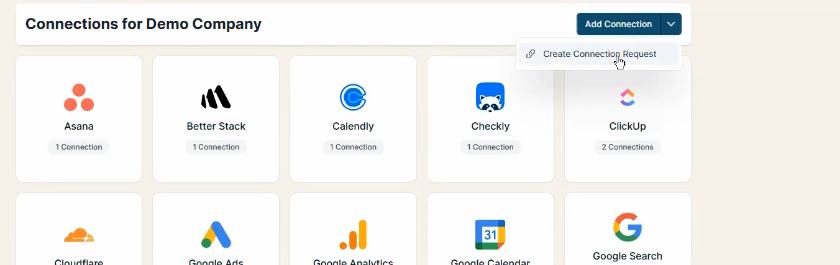
On the Connections page, click the caret next to the Add Connection button, then select Create Connection Request.
This is the step people miss. Clicking Add Connection itself starts a normal Connection, where you authorize the account. The Connection Request lives in the dropdown beside it.
3. Select Shopify as the Source
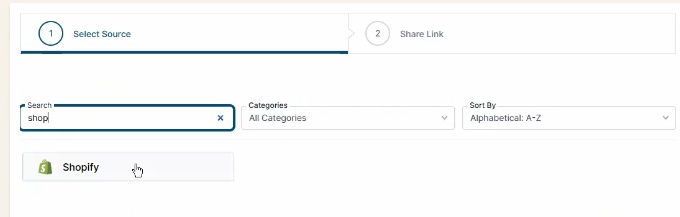
In the Select Source step, search for and select Shopify, then click Next.
4. Review the Share Link Step
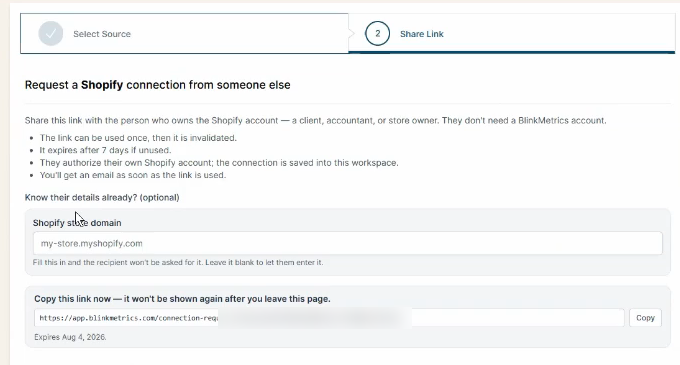
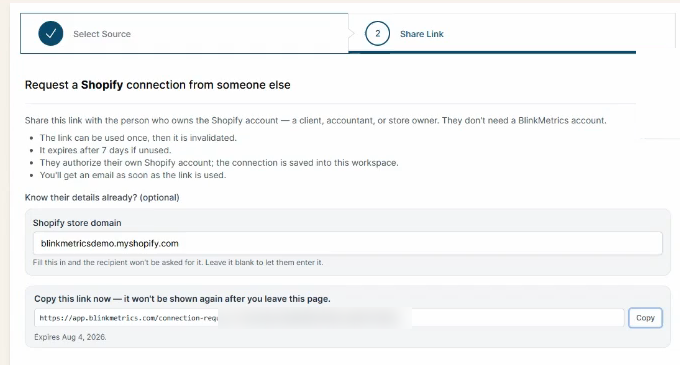
The Share Link step generates the link and spells out how it behaves:
- The link can be used once, then it is invalidated.
- It expires after 7 days if unused.
- The recipient authorizes their own Shopify account; the Connection is saved into your workspace.
- You’ll get an email as soon as the link is used.
5. Add the Shopify Store Domain
Under Know their details already? (optional), enter the Shopify store domain — the store’s .myshopify.com address.
This field is optional, but fill it in whenever you can. As the helper text says: fill this in and the recipient won’t be asked for it. That’s one less thing for your client to look up, and one less place for them to make a typo.
Finding the store domain
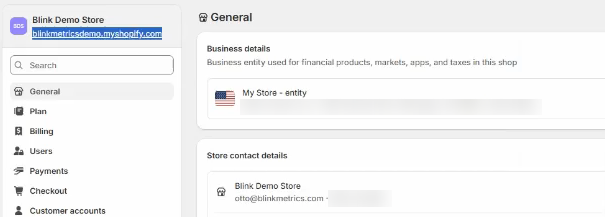
If you have access to the Shopify admin, go to Settings > General. The .myshopify.com domain sits directly under the store name in the top-left corner.
If you don’t have access, leave the field blank — the recipient will be asked for it instead.
6. Copy the Link Before You Leave the Page
Click Copy to copy the link, then click Finish.
Copy the link now. As the page warns, it won’t be shown again after you leave. The expiry date is listed directly beneath it. If you navigate away without copying, create a new Connection Request.
7. Send the Link
Paste the link into an email to the person who owns the Shopify account.
Tell them the request is coming before it lands. An unexpected email asking someone to authorize access to their store data is exactly the sort of thing a careful person ignores — and the link expires in 7 days.
What the Recipient Sees
Share this section with the person you’re sending the link to so they know what to expect. They will not need a BlinkMetrics account, and they’ll never see your workspace.
1. They open the link
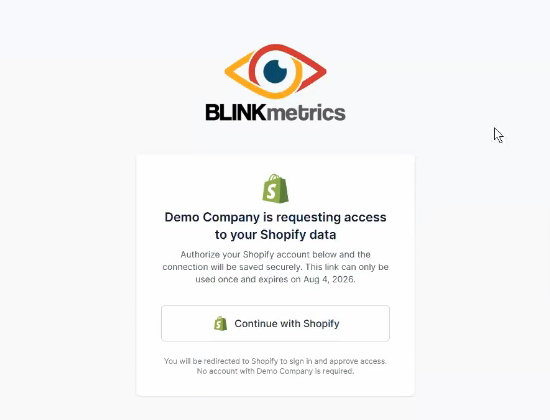
The page names the workspace requesting access — for example, “Demo Company is requesting access to your Shopify data” — and repeats that the link can only be used once and when it expires. They click Continue with Shopify.
2. They sign in and approve access
Shopify takes over from here. If they’re already signed in to the Shopify admin in that browser, they go straight to the approval screen. If not, they’ll sign in to Shopify first. Either way works.
If you filled in the store domain in step 5, they won’t be asked for it. If you left it blank, this is where they’ll enter it.
3. They’re done
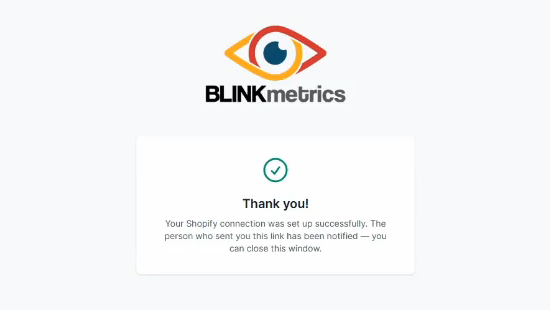
A confirmation page tells them the Connection was set up successfully, that the person who sent the link has been notified, and that they can close the window. There’s nothing else for them to do.
What Happens on Your End
You get an email
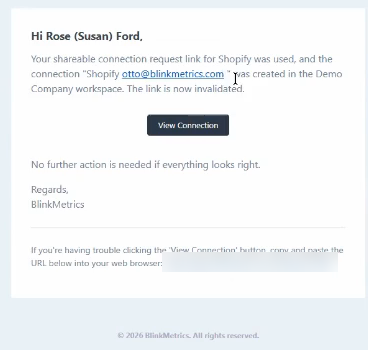
As soon as the link is used, BlinkMetrics emails you with the subject “Your connection request link was used”. It confirms which Source was connected, the name of the new Connection, the workspace it landed in, and that the link is now invalidated. A View Connection button takes you straight to it.
The Connection appears in your workspace
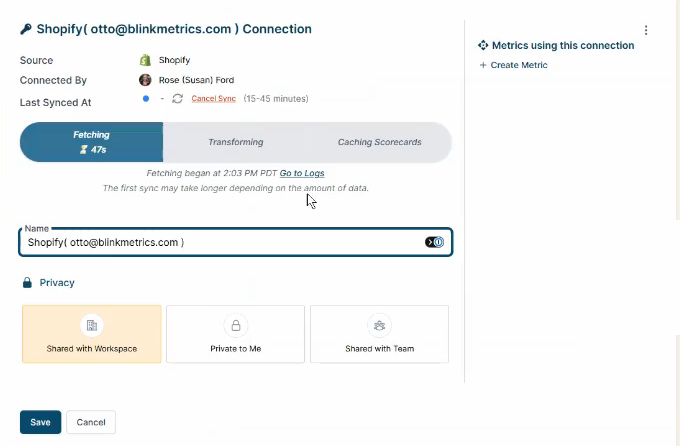
The new Connection opens on its detail page and starts syncing immediately. From here you can review:
- Source, Connected By, and Last Synced At. The Connection is attributed to you — the person who created the request — while the Connection name carries the Shopify account that authorized it, so you can tell at a glance which store it points to.
- The sync progress: Fetching, Transforming, and Caching Scorecards. Shopify data refreshes on a 15–45 minute sync cycle, and the first sync may take longer depending on how much data the store holds.
And you can edit:
- Name: Used for organizational purposes. Each Source can have multiple Connections, so it’s helpful to see which store a Connection points to.
- Privacy: Choose who it’s shared with — Shared with Workspace, Private to Me, or Shared with Team.
Click Save when you’re done. The Connection now sits alongside every other Source in your workspace, ready to build metrics from.
Troubleshooting
The link expired. Connection Request links are valid for 7 days. Create a new request and send a fresh link.
I navigated away before copying the link. The link is shown once and can’t be retrieved. Create a new Connection Request.
The recipient says the link doesn’t work. Each link works exactly once. If it’s already been used — or someone else opened it first — it’s invalidated. Check whether the Connection already appeared in your workspace before sending a replacement.
The recipient can’t approve access in Shopify. They need to be able to sign in to the Shopify account and approve app access for that store. If they hit a permissions wall, send the request to the store owner instead.